
Learning how to claim your website on Pinterest is an essential step when setting up your business account. There are several ways to do it, depending on the website platform that you are using. In this blog post I will walk you through the top 2 main website platforms – WordPress and Squarespace.
If you are not yet convinced that Pinterest is a platform you should pursue in your marketing plan, then let me try and convince you here.
Why should you claim your website?
- It will allow you to display your website URL on your Pinterest account letting people know where they can find more of your content (it will appear with a globe ticked icon next to it)
- Your profile picture will show up next to any Pins that come from your site as well as a ‘Follow’ button for your Pinterest account.
- Your business will automatically gain credibility with a claimed website.
- You will get access to analytics for the Pins you publish from your site
- You will get access to the analytics on Pins that other people create from your site
- It will allow you to enable rich pins on your account, so your pins can be recognised and branded as your own.
- You can claim more than one website per Pinterest account.
Convinced yet? Yes? Let’s dive in!
Instructions for wordpress
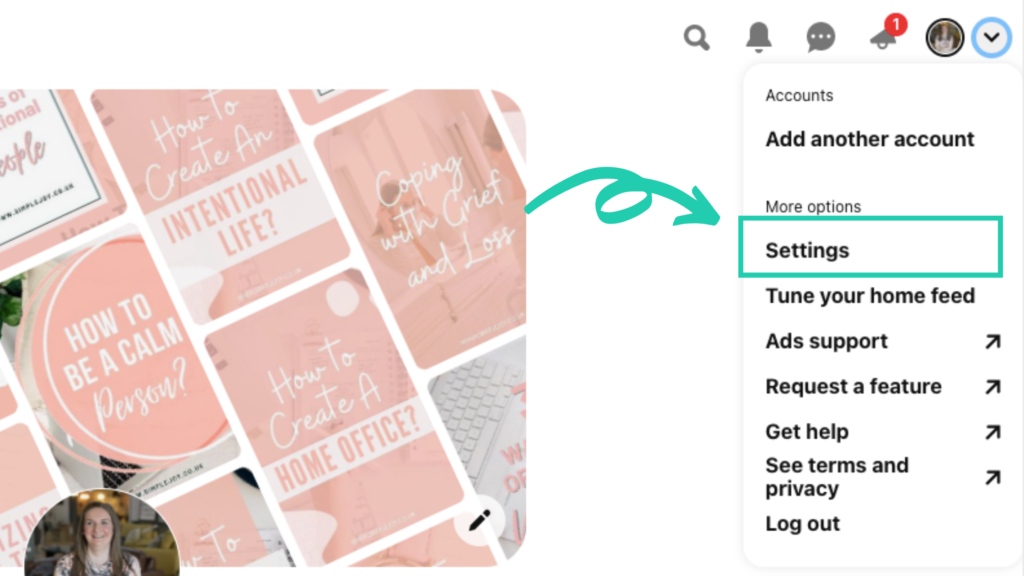
- Log in to your Pinterest account – click the arrow facing down on the right corner of your screen beside the small icon of your photo and go to Settings.
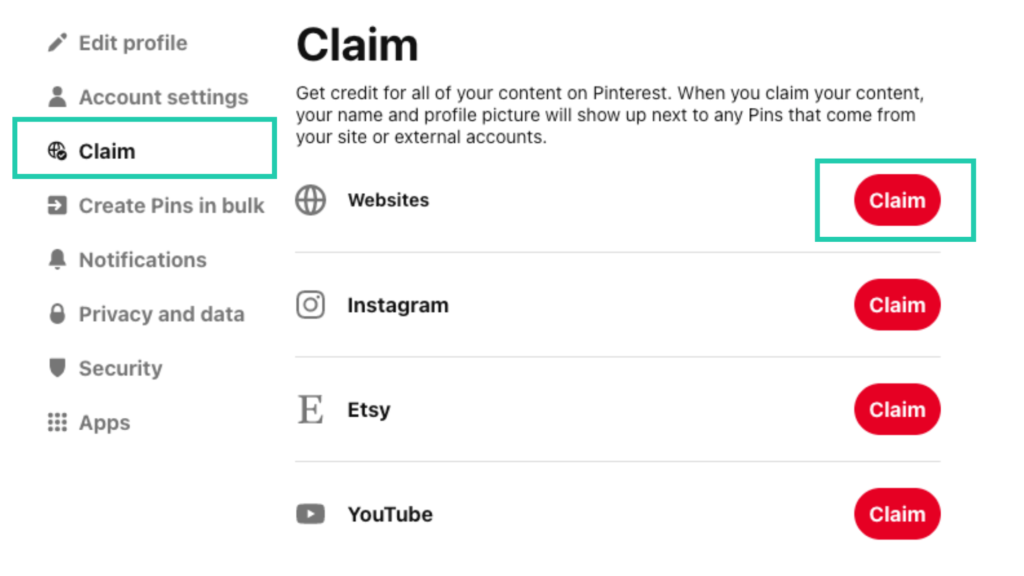
2. Then click claim on the left hand menu. Then click claim next to the website section.
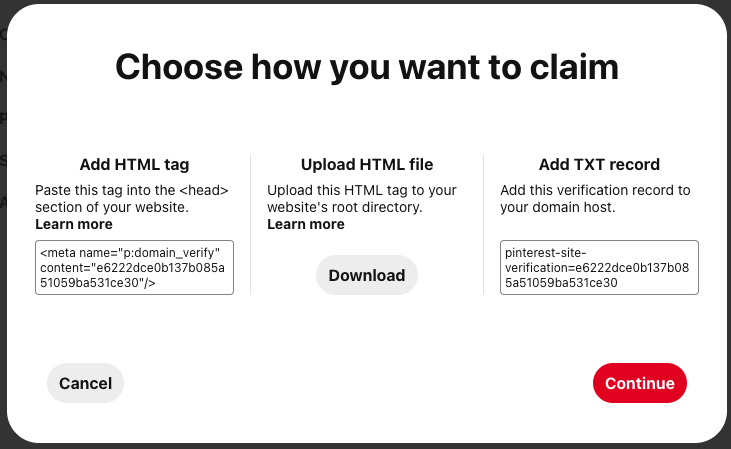
3. This box will pop up. Select the Add HTML tag option and copy the meta tag. Before you even click ‘Continue’ – make sure to do the remaining steps first on your website platform.
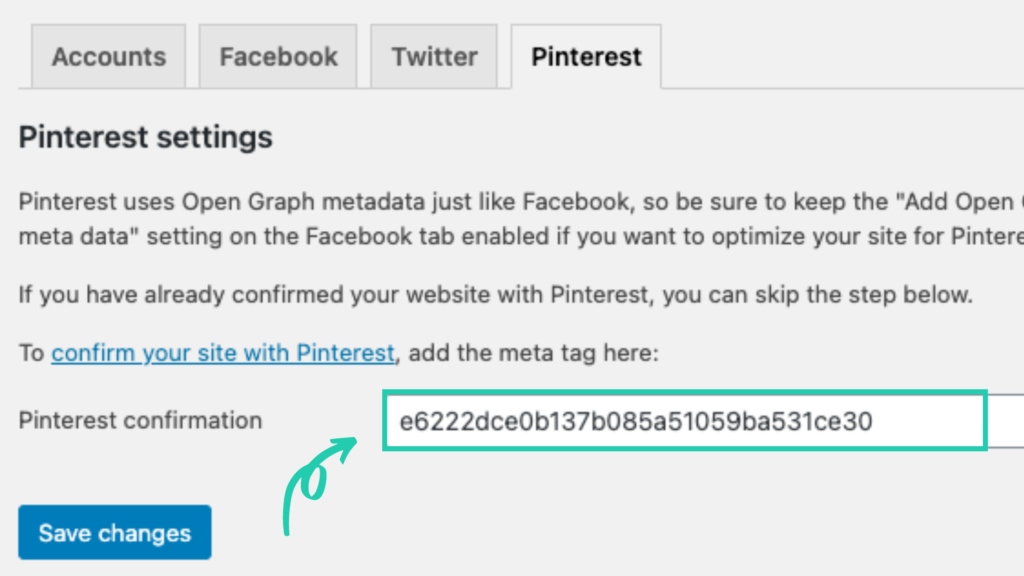
4. Now login to your WordPress account. Make sure you have the WP-Plugin called Yoast SEO installed and activated.
5. Go to the Yoast SEO plugin and click on the Pinterest tab.
6. Paste the HTML tag in the Pinterest confirmation box and save changes. Make sure a green tick appears and it says ‘Settings Saved” before moving forward.
7. Now return to Pinterest and click Continue.
8. Enter your website URL and click Verify.
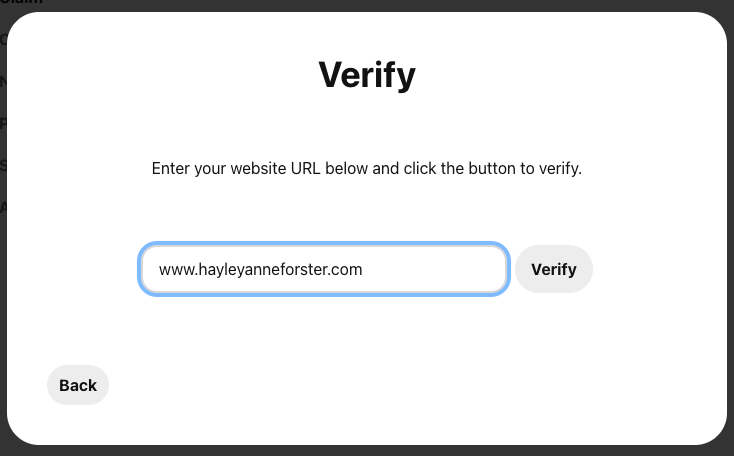
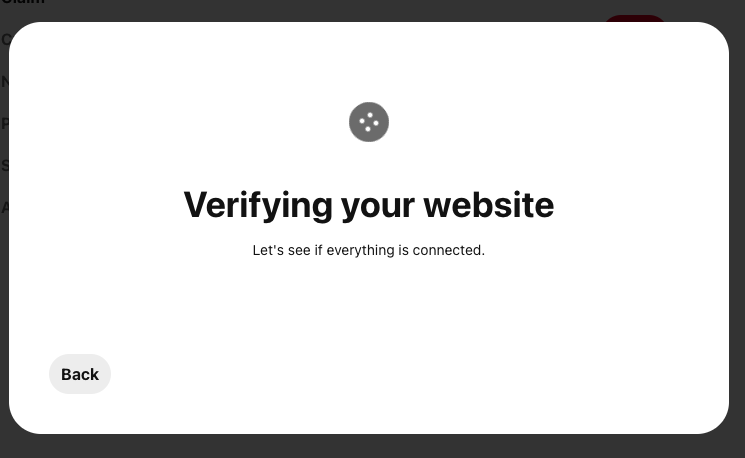
9. You will see a message indicating that your account is currently under review. The results will be emailed to you after 24 hours, if not immediately on the screen.
SQUARESPACE
- In the Home Menu, click Settings.
- Click Connected Accounts.
- Click Connect Account.
- Select Pinterest from the Social Accounts menu.
- Log in using your Pinterest username and password.
- Click Allow to authorise the connection between Pinterest and your site.
- Click Save.
Et Voila!
Now you have claimed your website on Pinterest and stepped up your Pinterest game!
Any questions, drop them below.
Now it is time for you to Enable Rich Pins…..

READY TO TAKE YOUR PINTEREST GAME UP A LEVEL?
Get your free 10 Tips to Go Viral on Pinterest PDF.
These are the exact tips I use with all of my clients to get them firing on all cylinders and making powerful strides forward in their Pinterest marketing!